Piriformis Syndrome is no joke! This painful condition can wreak havoc on our gluteal region and severely impact daily life. But fear not, for there is an effective solution – the sitting piriformis stretch. Join us on this comprehensive guide as we explore the ins and outs of this stretch, from understanding Piriformis Syndrome to mastering the art of sitting pain-free!
Have you ever wondered why sitting for extended periods feels like torture? Enter Piriformis Syndrome, the culprit behind that shooting pain and sciatica pain in the buttocks.

Piriformis Syndrome is caused by the irritation or compression of the sciatic nerve, which runs underneath or sometimes through the piriformis muscle. When the piriformis muscle becomes tight or injured, it can put pressure on the sciatic nerve, resulting in pain, numbness, or tingling sensations that radiate from the buttocks down the leg.
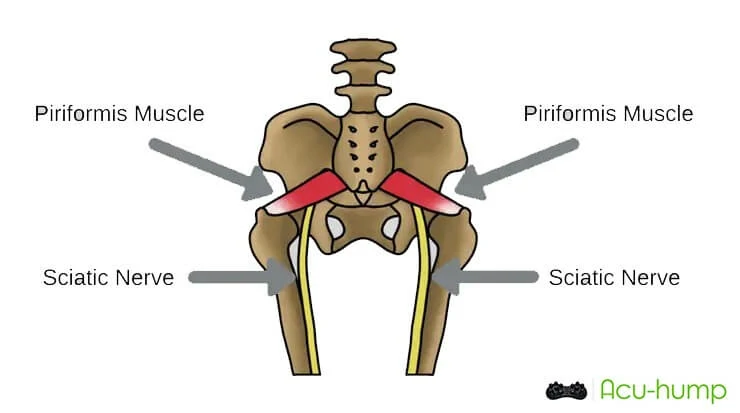
This explains the above question – the constant pressure on the piriformis muscle aggravates the already irritated nerve, intensifying the pain in the buttocks while sitting.
So, whether it’s due to muscular tightness or an injury, the piriformis muscle becomes a formidable adversary during prolonged sitting, making it an activity to be dreaded.
But fear not, as we embark on this journey through the symptoms and causes of piriformis syndrome, we’ll equip you with the knowledge needed to combat this gluteal menace with targeted stretches and preventive measures.
Benefits of Stretching for Piriformis Syndrome
Stretching – the superhero of muscle tension relief! When it comes to Piriformis Syndrome, incorporating regular stretching exercises into your routine is not just crucial but also transformative.
Stretching the piriformis muscle helps to alleviate tension and tightness, providing much-needed relief for those suffering from this condition. By elongating and loosening the piriformis muscle, stretching reduces the compression on the sciatic nerve, thereby minimizing the shooting pain and discomfort in the buttocks.
But that’s not all – stretching also plays a vital role in preventing complications and recurrence of Piriformis Syndrome. By maintaining flexibility and improving muscle strength, stretching helps to counteract the factors that contribute to the development of this condition.
So brace yourself and get ready to unlock the superpowers of the sitting piriformis stretch, as we unveil the undeniable benefits it brings in the battle against Piriformis Syndrome. Incorporate this stretch into your daily routine, and witness the transformative effects it can have on your quality of life.
Performing the Sitting Piriformis Stretch
Get ready to embark on a stretch-tastic adventure! In this section, we will provide you with a comprehensive step-by-step guide on how to perform the sitting piriformis stretch with precision and efficiency.
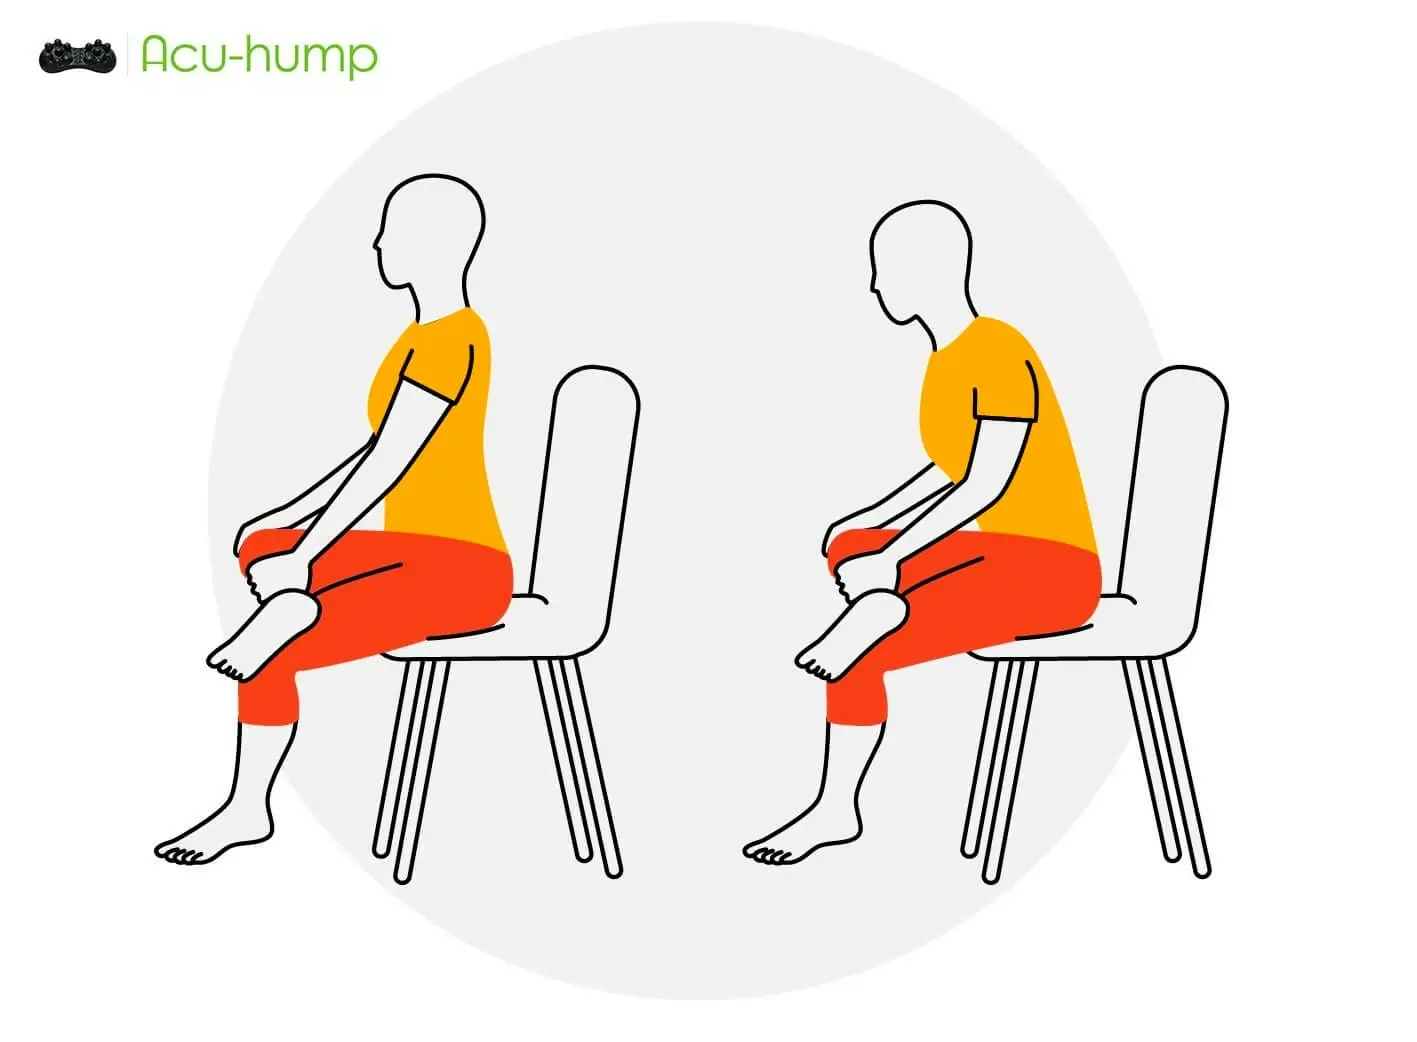
1. Start by sitting on a sturdy chair or bench with your feet firmly planted on the ground.
2. Cross your affected leg over the opposite knee, while keeping your back straight and your shoulders relaxed.
3. Gently press down on the inner knee of the crossed leg using your hand or forearm, applying a mild, controlled pressure. This will gradually engage the piriformis muscle.
4. As you press down, simultaneously lean forward from your hips, keeping your back straight, until you feel a comfortable stretch in your buttocks or outer hip of the crossed leg. Remember not to force the stretch or push beyond your limits.
5. Hold the stretch for 20-30 seconds while maintaining steady breathing. You should feel a mild tension but no pain.
6. Slowly release the pressure and sit back up, allowing your crossed leg to return to a relaxed position.
7. Repeat the stretch 2-3 times on each leg, alternating sides if necessary.
Tips and Precautions
Remember, it’s essential to practice proper posture, positioning, and technique to maximize the effectiveness of the sitting piriformis stretch. Ensure that your back remains straight throughout the exercise to prevent unnecessary strain on your spine.
Additionally, focus on isolating and targeting the piriformis muscle by gently applying pressure on the inner knee of the crossed leg. As with any stretching exercise, listen to your body and avoid pushing beyond your comfort level to prevent injury.
Whether you are a beginner or have experience with stretching, these guidelines will ensure that you achieve optimal results while performing the sitting piriformis stretch.
Incorporating the Stretch into Daily Routine
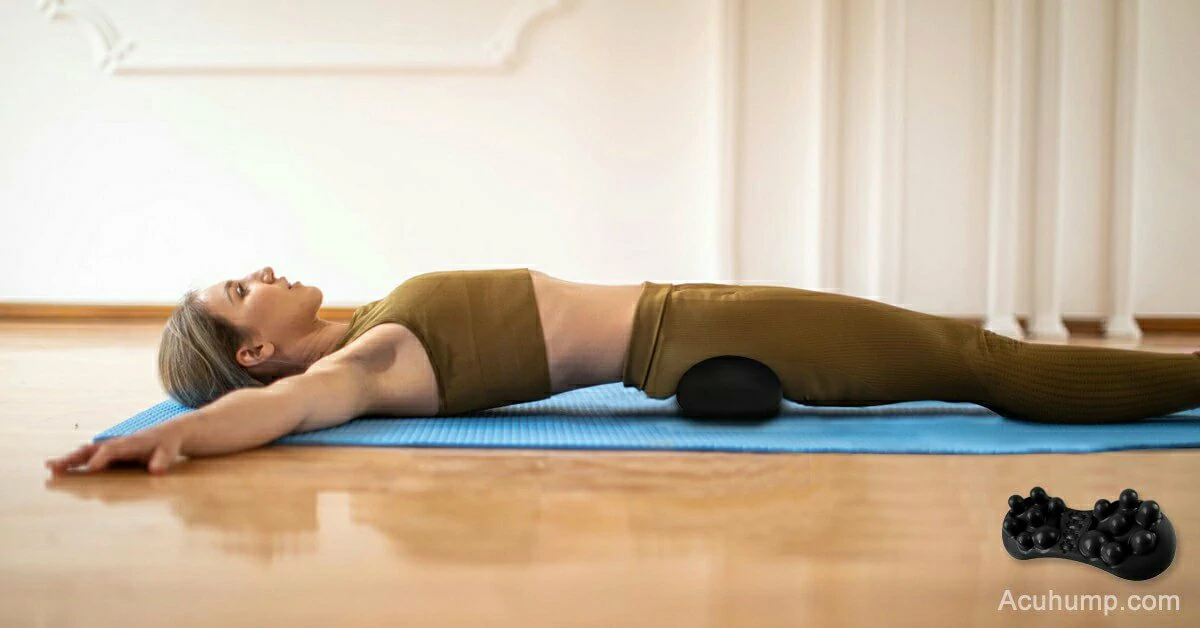
The secret to success lies in consistency! But if you’re looking for even faster recovery and a more comprehensive relaxation experience, consider adding the Acu-hump to the mix.
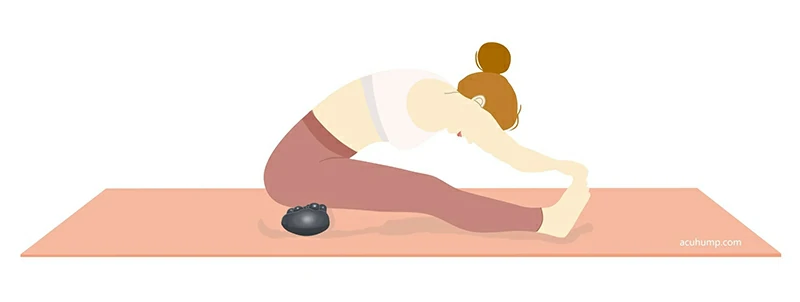
This 10-minute stretching exercise consists of 6 movements specifically designed to target and release tension from the lower back to the buttocks.

Consistency is key! Aim to perform is lying piriformis stretching routine at least 3-4 times a week, gradually increasing the number of repetitions or duration as your flexibility improves.
With dedication and regular practice, you’ll bid farewell to piriformis pain and welcome a life of freedom and flexibility. Get ready to transform your well-being!

Acu-hump: 30-day return policy.
You have no risk.
Symmetrical 14 pressure point nubs are based on the principle that pressure applied to deep tissue can activate the nervous system and release muscle knots.
Combined with the hump shape designed for stretching muscles, these help to relieve your muscles, reduce tension and improve circulation.
Congratulations, you’ve made it to the end of our comprehensive guide! Armed with the knowledge of Piriformis Syndrome and the power of the sitting piriformis stretch, you’re now equipped to conquer the gluteal battlefield. Remember, pain management and improved quality of life are within your reach.
So, stretch your way to victory, and may your piriformis muscle forever be happy and relaxed! And of course, should pain persist, don’t hesitate to seek professional guidance – because happy buttocks are no laughing matter!
Acu-hump®
Release Butt & Lower Back
