Maintaining a cardio routine is crucial for individuals with piriformis syndrome, as it promotes overall health and well-being. By incorporating low-impact exercises and specific stretching techniques like Acu-hump stretches, it is possible to engage in cardio workouts while minimizing discomfort and facilitating healing. These exercises are designed to reduce strain on the piriformis muscle and alleviate symptoms associated with piriformis syndrome.
Importance of Low-Impact Exercises
Low-impact exercises play a significant role in reducing strain on the piriformis muscle. These exercises minimize the risk of aggravating the condition and help manage symptoms effectively. Additionally, they offer various benefits such as improved cardiovascular health, weight management, and enhanced mood. Incorporating low-impact cardio exercises into your routine can provide a well-rounded approach to maintaining overall fitness.
What Cardio Exercise Helps with Piriformis Syndrome
Walking is excellent low-impact exercises for individuals with piriformis syndrome. Walking helps increase blood flow, strengthen muscles, and improve posture. To maximize its benefits, maintaining proper posture, wearing supportive footwear for added stability and upper body engagement is recommended.

Cycling, whether indoors or outdoors, is another effective cardio exercise. Proper bike setup, including adjusting seat height and positioning, is vital to prevent excessive strain on the hips and lower back. Cycling provides a low-impact workout that enhances cardiovascular fitness, leg strength, and overall endurance.

For individuals with access to a pool, swimming and water aerobics are highly beneficial. The buoyancy of water reduces joint impact, making it gentle on the piriformis muscle. Specific strokes such as freestyle or breaststroke, or engaging in water aerobics exercises, can help strengthen muscles and improve cardiovascular health while minimizing strain on the affected area.

Acu-hump Stretching Exercises
The Acu-hump stretching technique specifically targets the piriformis muscle, providing relief from tension and pain associated with piriformis syndrome. It involves a series of stretches designed to stretch and loosen the muscle, promoting flexibility and reducing discomfort.

Emphasizing proper form, breathing deeply, and listening to your body’s signals during the stretches is essential. Start with mild stretches and gradually increase intensity as tolerance permits. Regular practice of Acu-hump stretching exercises can improve flexibility and alleviate symptoms over time.
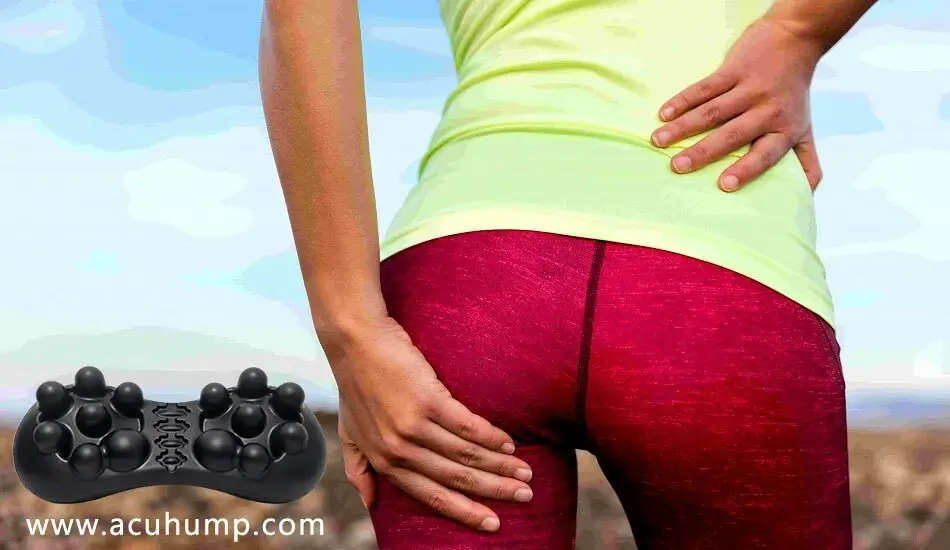
Acu-hump: 30-day return policy. No risk for you.
The following is the complete Acu-hump stretch routine to relax the lower back to the hips
1# Step: Lower Back
The Acu-hump specifically targets the Quadratus Lumborum (QL) muscles, which can become tight and knotted due to factors such as poor posture, sitting for long periods, or improper lifting techniques. By applying pressure to these muscles, the Acu-hump helps release tension and promote relaxation.
Muscle tension in the QL area can cause discomfort, pain, and even referred pain in other areas of the body such as the hips, buttocks, and thighs. The Acu-hump provides targeted relief, reducing pain and discomfort associated with tight QL muscles.

Acu-hump: Full refund policy. No risk for you.
Start Slowly: If you are new to using the Acu-hump, start by lying on it for a few minutes at a time. Gradually increase the duration as you become more comfortable and accustomed to the sensation.
Adjust Positioning: Experiment with the placement of the Acu-hump on your lower back to find the most effective position for targeting your QL muscles. You may need to slightly adjust the position or angle to ensure optimal contact and pressure.
Breathe and Relax: While lying on the Acu-hump, focus on deep breathing and consciously relax the muscles in your lower back. This can help enhance the effectiveness of the tool and promote overall relaxation.
2# Step: Lumber Spinal
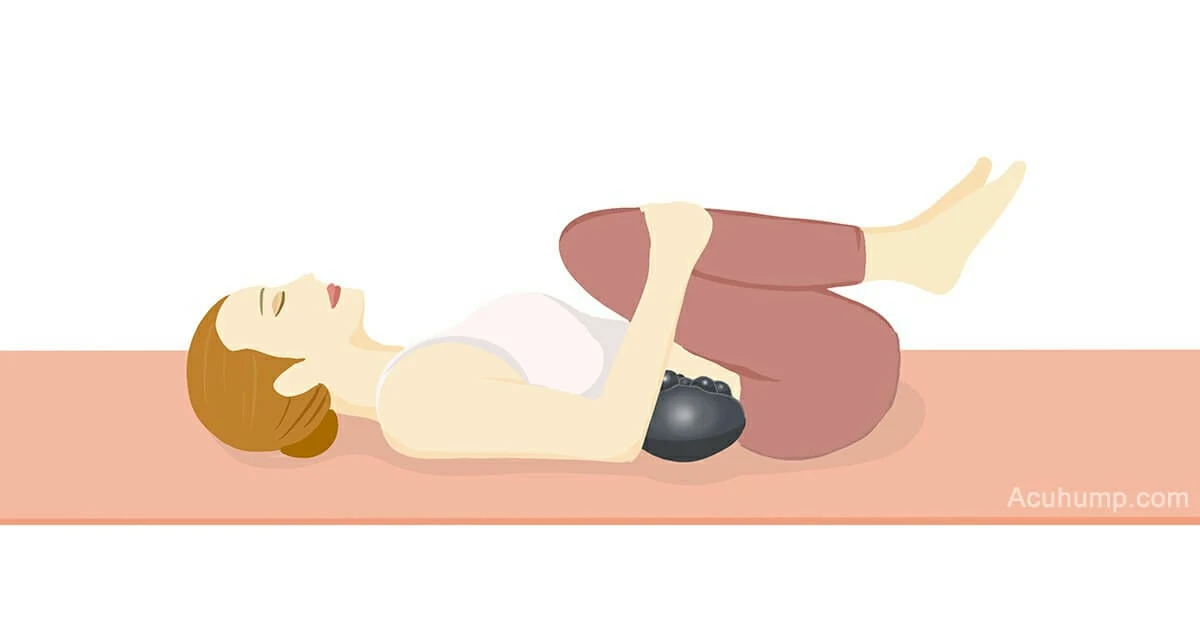
The Acu-hump massage stretcher specifically targets the lower back region and can provide effective relief from pain caused by conditions like bulging disc, herniated disc, sciatica, or Cauda Equina Syndrome. By using this tool, you can alleviate discomfort and promote healing in the affected area.
Acu-hump® Relieve Piriformis Pain
Step 1: Find a flat, hard surface like the floor to lie on. This will provide the necessary pressure to engage your muscles effectively.
Step 2: Position the Acu-hump massage stretcher under your spine, making sure that the taller side is near your head and aligned with the area causing you discomfort. This targeted placement will help focus the relief on the specific region you are targeting.
Step 3: Gently hug your legs to your chest and hold this position for about 30 seconds. This motion helps stretch the muscles in your lower back, effectively reducing pain and discomfort.
Step 4: Release your hands and straighten your legs, maintaining this position for another 30 seconds. By doing so, you continue to stretch the muscles in your lower back while promoting increased blood circulation to the area, facilitating healing.
Step 5: Repeat steps 3 and 4 as desired or until you achieve optimal results. Consistency is vital to experiencing the full benefits of the Acu-hump massage stretcher.
3# Step: SI Joint
By incorporating regular sessions with the Acu-hump massage stretcher into your routine and following these specific steps, you can effectively target and alleviate discomfort associated with Sacroiliac Joint Dysfunction or Pubic Symphysis issues:
Acu-hump® Relieve Piriformis Pain
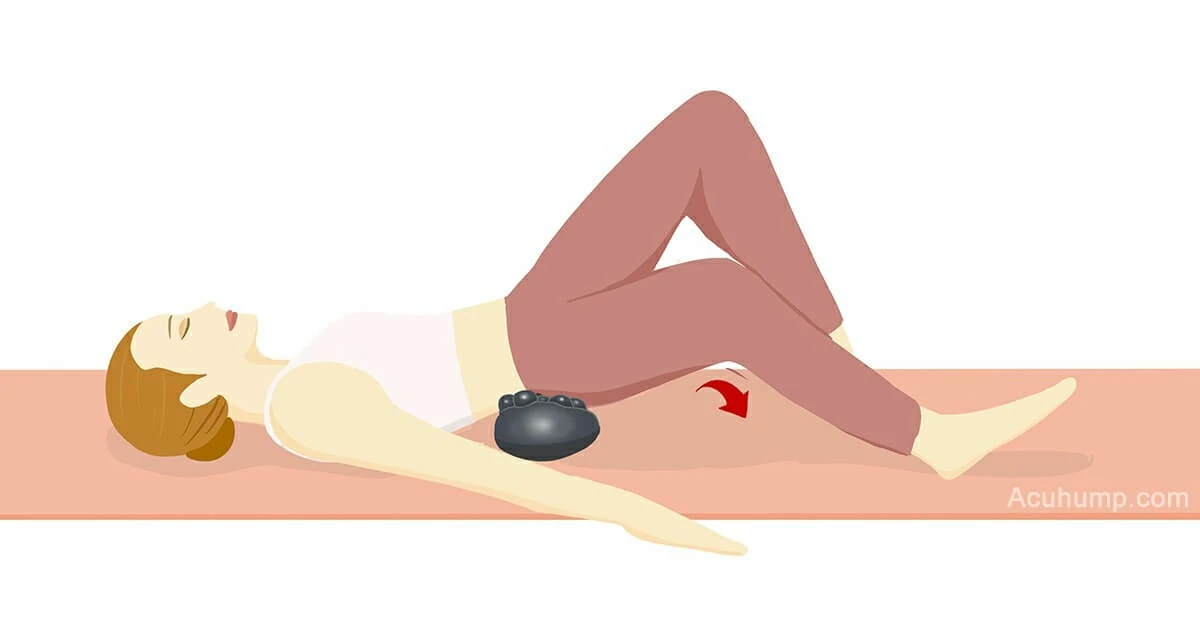
Step 1: Find a hard surface, such as the floor, and lie flat on it. Position yourself in a way that allows for proper pressure on the affected area.
Step 2: Place the Acu-hump massage stretcher under your Sacroiliac (SI) joints, ensuring that the taller side is aligned with the affected area. This proper alignment allows for targeted relief.
Step 3: Bend your legs and create a slight distance between your knees that is wider than your shoulders. This position helps alleviate the pain associated with Sacroiliac Joint Dysfunction and Pubic Symphysis issues.
Step 4: Keep one leg steady while slowly swinging the other leg towards the ground. Hold this position for around 15 seconds before bringing your leg back up. This swinging motion helps stretch the affected muscles and release tension in the targeted areas.
Step 5: Repeat step 4 with the other leg. Each time you swing your leg towards the ground, hold the position for approximately 15 seconds. This allows for optimal stretching and relaxation of the muscles in the affected areas.
4# Step: Psoas & Hip Flexor
To effectively target and alleviate lower back pain using the Acu-hump massage stretcher, follow these steps:
Step 1: Begin by lying on your back with your knees bent and your feet a few inches away from your buttocks. This position ensures proper alignment and muscle engagement.
Step 2: Lift your hips into a low bridge position and place the Acu-hump massage stretcher horizontally under your sacrum, using the medium setting. Make sure the device is properly positioned to provide support and relief to your lower back.
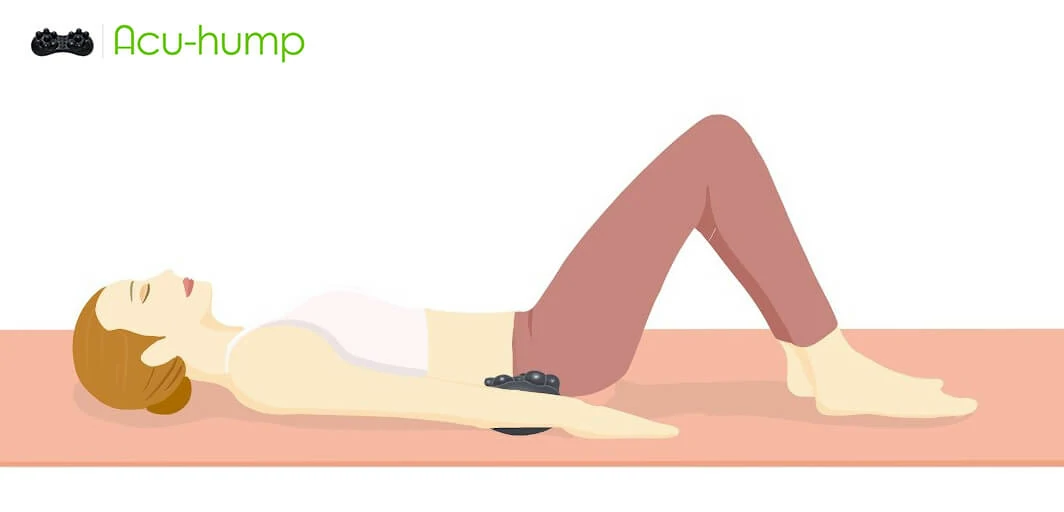
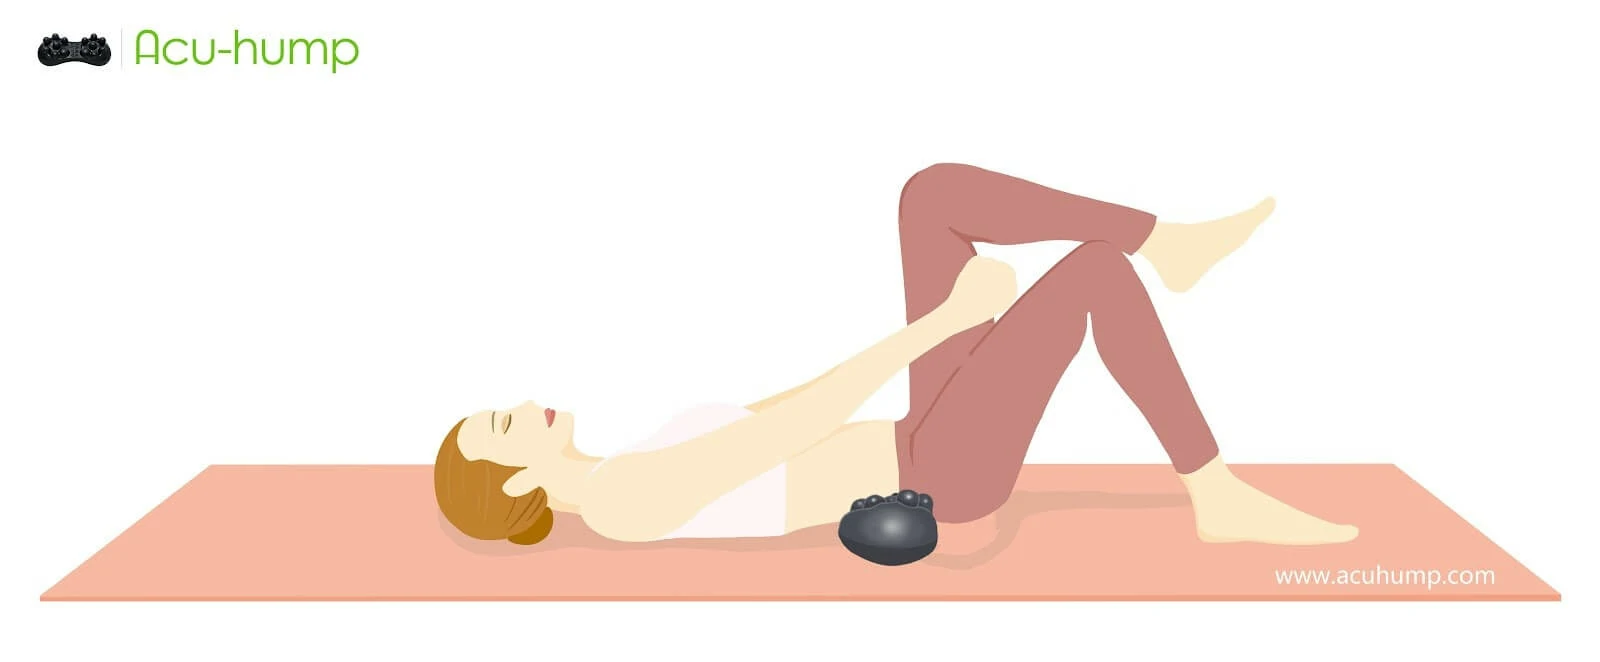
Step 3: Ground your left foot securely and bring your right knee towards your chest. Using one or both hands on top of your right thigh for support, gently push your right knee away from your body. Take three deep breaths in this position to allow for a gentle stretch and the release of tension in the lower back.
Step 4: Gradually straighten your right leg, applying light pressure on your thigh with your right hand. Allow your leg to relax as your right thigh naturally lowers toward the ground. This elongates and stretches the muscles in your lower back.
Step 5: Bend your right knee, place your foot back on the floor, and repeat the same steps with your left leg. Balancing the stretches on both sides ensures even relief and promotes proper alignment.
Step 6: After stretching both sides, extend both legs out while keeping them slightly apart and parallel. Rest your hands gently on the top of your thighs and press down lightly, being cautious not to hyperextend your lower back. Take deep breaths and hold this position for several breaths or a few minutes, if comfortable. This helps release tension and promotes relaxation in the muscles of the lower back.
Acu-hump: 30-day return policy. No risk for you.
5# Step: Figure 4 Piriformis Stretch
To maximize the benefits of the figure 4 stretch and enhance your overall well-being, incorporate the Acu-hump massage stretcher into your routine. Below are the steps to follow:
Step 1: Lie flat on your back with your knees bent and both feet on the ground. This position promotes stability and proper alignment during the stretch.
Step 2: Place the Acu-hump massage stretcher under your sacrum, ensuring that the high side of the device faces towards your head. This strategic placement provides support and increases the effectiveness of the stretch.
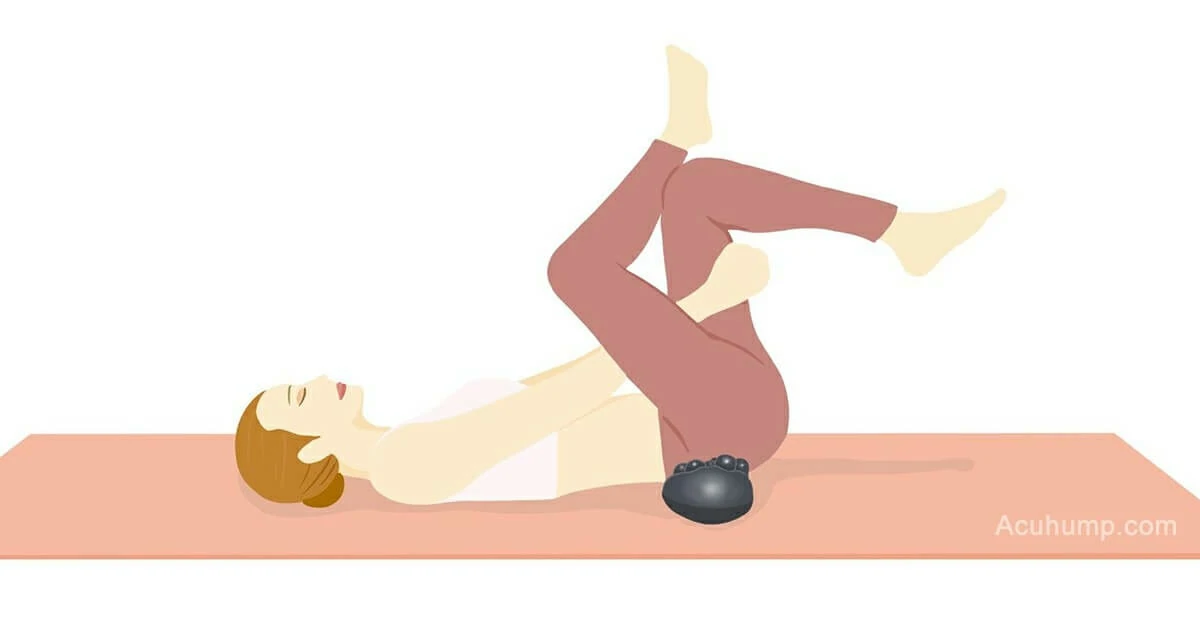
Step 3: Keep your left foot on the floor and cross your right ankle over your left knee, creating the shape of a figure 4. This position, combined with the assistance of the Acu-hump, targets the muscles in your hips and lower back, providing relief from pain and tension.
Step 4: Gently pull your left thigh towards your chest using your hands, while keeping your right leg bent. This movement effectively stretches the muscles in your hip and lower back, releasing tension and promoting relaxation.
Step 5: Hold the stretch for approximately 30 seconds, allowing your body to gradually adapt to the movement. The Acu-hump massage stretcher provides added stability, allowing you to maintain the figure 4 position comfortably and achieve a deeper stretch.
Step 6: Release the stretch and switch sides, repeating the same steps with your opposite leg. This balanced approach ensures that both hips and lower back receive equal attention and benefit from the stretch.
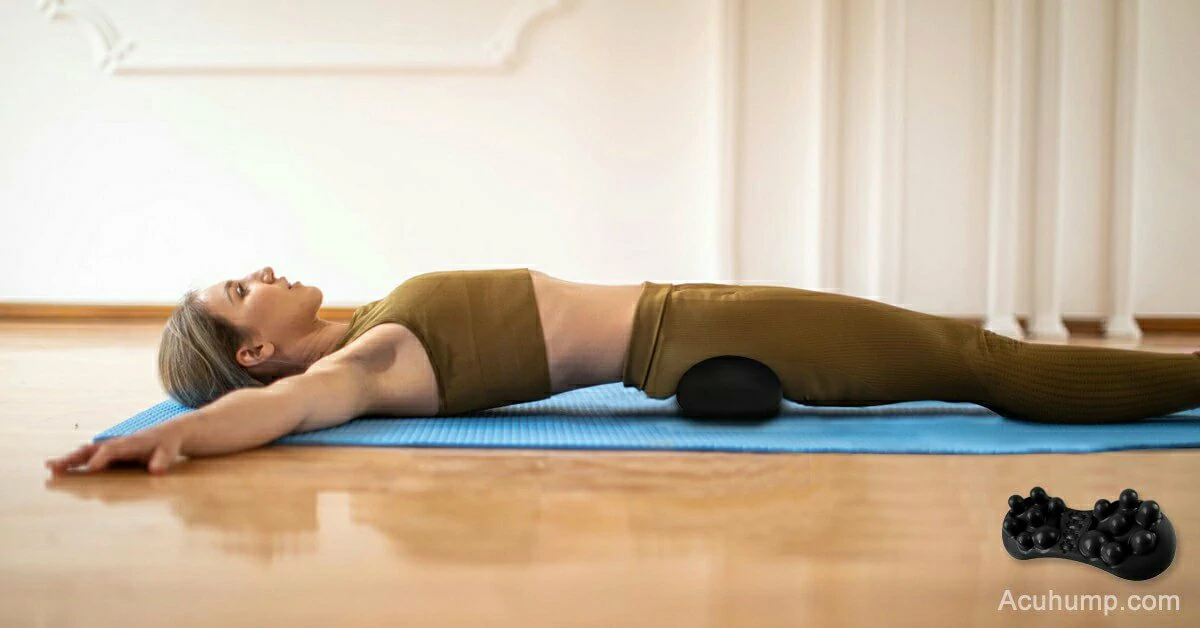
Acu-hump®
Release Butt & Lower Back
6# Step: Hamstrings and Sciatica
To effectively relax the muscles from the buttocks to the legs, reduce pressure on the sciatic nerve, and improve mobility and comfort, focusing on stretching the leg roots is key.
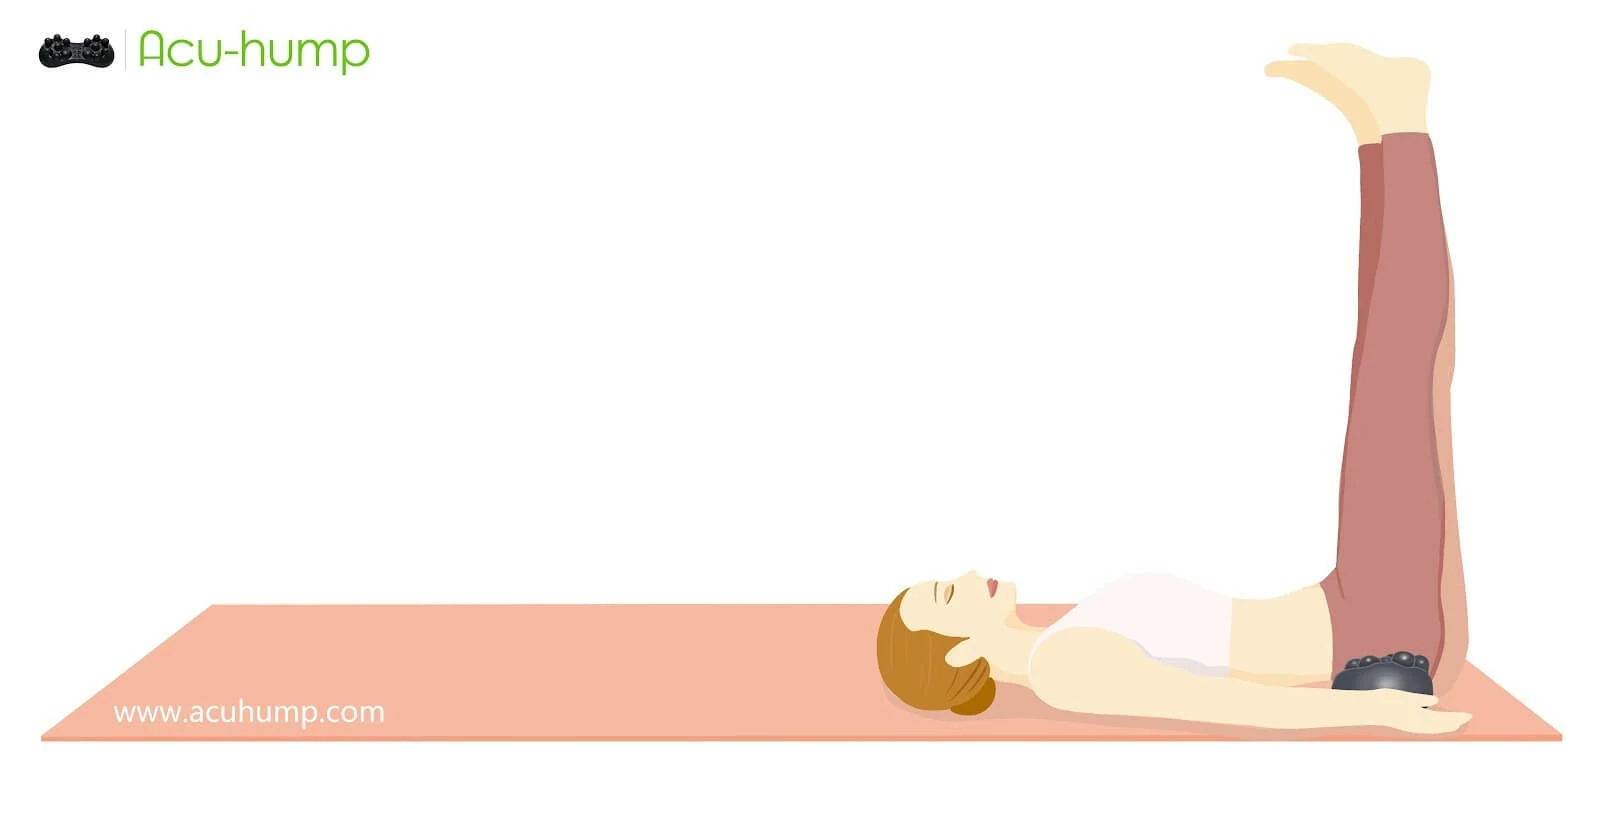
This is particularly beneficial for individuals dealing with piriformis syndrome or sciatica. By incorporating the following exercises into your routine, you can prevent or alleviate symptoms associated with these conditions, leading to increased flexibility and reduced discomfort in the lower back and legs. It’s essential to listen to your body and breathe deeply during the stretches to ensure a safe and effective experience. If any pain or discomfort arises, it’s crucial to stop and adjust accordingly.

Acu-hump: 30-day return policy.
You have no risk.
Warm-up and Cool-down Routine
Before engaging in cardio exercises, warming up is essential to increase blood flow and prepare the muscles for activity. Incorporating dynamic stretches and mobility exercises can help warm up the muscles and joints, reducing the risk of injury. Examples of dynamic stretches include marching in place, arm circles, and hip rotations.
Cooling down after a workout is equally important. Performing static stretches that target the piriformis muscle and surrounding areas helps reduce muscle tension and maintain flexibility. Static stretches can include standing or seated piriformis stretches, hamstring stretches, and gentle glute stretches.
Modifications and Listening to your Body
Individuals with piriformis syndrome may require modifications based on their limitations and the level of discomfort experienced during exercises. It is essential to listen to your body’s signals and adjust the exercises or stretches accordingly. If an exercise exacerbates symptoms, it may be necessary to modify or avoid it altogether.
Acu-hump: Full refund policy. No risk for you.
With the incorporation of low-impact cardio exercises and specific Acu-hump stretching techniques, individuals with piriformis syndrome can engage in cardio workouts that minimize discomfort and promote healing. By listening to your body, making necessary modifications, and consulting healthcare professionals, you can safely incorporate exercise into your routine, supporting overall health and well-being. Enjoy the benefits of cardio while managing and alleviating piriformis pain.
